
The service rifle changes over time to whatever the Army and Marine Corps decide to use as the primary weapon for the majority of Soldiers and Marines. For many years that has been the M16 and now the M4 is making its way into each service. For this study we will look at each current platform to include the M1 Garand, M14, and M1903 tracking the history of each, if necessary.
This is a bit long and photo-intensive, and very much worth your time, especially if you are breathing (Active Duty, Reserve, National Guard, ROTC/JROTC instructors, cadets of all organizations, and judges).
TC 3-21.5, Drill and Ceremonies (Army)
The M4

5-7. To Present Arms from Order Arms (see figure 5-5), use the following procedures:
TC 3-21.5 3 May 2021
- Present Arms is a three-count movement. The command is Present, ARMS.
- On the command of execution ARMS, execute Port Arms in two counts.
- On count three, twist the carbine with the right hand so that the carbine is vertical and centered on the body about 4 inches from the waist with the magazine well to the front. Lower the carbine until the left forearm is horizontal and keep the elbows tight against the sides.
The Army has traditionally wrapped the fingers of the right hand at Present. For the M4, the stock, once extended, is merely a tube that the fingers completely wrap around. The 2021 version of the Training Circular has abysmal drawings, unfortunately. That’s changing in 2024.
What does that text at the bottom of the image, “In Formation/Individual“, mean? It means that when in formation or when walking alone, this is the salute you use.
The M1 Garand, M14, and M1903/1917
B-5 [M16]. To execute Present Arms, use the following procedures:
- Present Arms from Order Arms is a three-count movement. The command is Present, ARMS. On the command of execution ARMS, execute Port Arms in two counts. On count three, twist the rifle with the right hand so that the magazine well is to the front, and move the rifle with to a vertical position with the carrying handle about 4 inches in front of and centered on the body. Lower the rifle until the left forearm is horizontal; keep the elbows in at the sides as seen in figure B-5 on page B-7.
C-4 [M14]. Note. When not at Order Arms, execute the movement in the same manner as previously described for the M16-series rifle in appendix B.
D-4 [M1903/M1917]. Execute Present Arms using the following procedures:
TC 3-21.5, 2021
- Present Arms from Order Arms is a three-count movement. The command is Present, ARMS. On the command of execution ARMS, execute Port Arms in two counts. On count three, twist the rifle with the right hand so that the sights are to the rear, and move the rifle to a vertical position about 4 inches in front of and centered on the body.


We need to look at some history for the right hand because, well, look at these cartoon drawings, for goodness sakes! Below: M16, M4, M14, and M1903/M1917.


The ONLY image of Present from the side. Ah-ha! Fingers are straight! No, she wrapped her fingers, It’s just that her fingers are not as long as the males’ above. You can tell because her fingers break the front of the small of the stock.
Wrapping the fingers is a very longstanding tradition, dating back to after The Revolutionary War era.

Present, ARMS.
REGULATIONS FOR THE FIELD EXERCISE, MANOEUVRES, AND CONDUCT OF THE INFANTRY OF THE UNITED STATES (emphasis mine, Smyth, 1812)
- With the left hand turn the piece, the lock to the front, seizing it with the right hand at the small.
- Bring up the piece with the right hand, quitting the butt with the left, and seizing the piece above the lock as high as the eyes, holding it perpendicular.
- Draw back the right foot six inches, sink the piece, the butt before the left knee, the fingers of the right hand extended, the ramrod to the front.
Present—ARMS.
One time and two motions.RIFLE AND INFANTRY TACTICS, REVISED AND IMPROVED (emphasis mine, Brig. Gen. W. J. HARDEE, C.S. ARMY, 1861)
- (First motion.) With the right hand, bring the piece erect before the centre of the body, the rammer to the front ; at the same time seize the piece with the left hand half-way between the guide sight and lower band, the thumb extended along the barrel and against the stock, the fore-arm horizontal and resting against the body, the hand as high as the elbow.
- (Second motion.) Grasp the small of the stock with the right hand, below and against the guard.
Fingers of the Right Hand and the Position of the Left Thumb
There is confusion as to both the right-hand fingers and especially for the Army with the left thumb. Do we “Thumb a Ride” as I call it by sticking the left thumb up or do we wrap the thumb. Let’s find out.

In 1891 we see the left thumb pointing up. The text never describes this.

The same looks to be in the drawing from 1904, the left thumb pointing upward. Again, the text never describes this.

In 1932, the Army publishes the Tentative FM 22-5. It’s not until 2012, that the Field Manual would become a Training Circular. The left thumb pointing upward disappears.
Do you notice that Present Arms from Order is a two-count movement? Port is not the in between position.


In 1950 (far left), we see the continuation of wrapped right fingers and wrapped left thumb and that continues in 1968. This is for all platforms.

In 1971 we have an additional piece of information. “In Formation” appears. What this means is that rifle salutes for the individual outside of a formation were still in practice until “/Individual” is added in 1986. Interestingly, rifle salutes are explained in 1958, 1964, and 1964, but not after. Until the 1986 version, Present is restricted to formations at ceremonies and for guard duty.
As we can see, photos do not show the left thumb sticking up, but some drawings do. These drawings have been copied over the decades without proper scrutiny being applied. Don’t thumb a ride, wrap your left thumb (unless your hand is too small, then point your thumb forward).
MCO 5060.20, Marine Corps Drill and Ceremonies (MC/USN/CG)
FYI: The cadet manuals for NJROTC, Sea Cadets, and Young Marines are unusable for drill and ceremonies. I do not follow them, and I do not teach from them. I teach from the service standards which is where these cadet manuals are supposed to get their information, but there are all kinds of wrong standards in them.
We need to know what it says and then turn to Appendix A Rifle Manual for the M1 Garand Service Rifle and App. B the manual for the M14.
When we look at the primary weapon section, we read and follow the images and see the only difference (a really BAD change from the earlier manual versions) is the thumb sticking out horizontally – like a sore thumb.
We know that’s the only change because we turn to Apps. A & B (similar platforms) and read and look at the images. Some Marines still use these time-honored rifles which is why you sometimes see a color guard with these rifles.


We see in all three images that the right arm has a slight, natural bend in the elbow. That bend depends on several factors:
- The rifle must be 4″ from your breastbone.
- The left hand must have the pinky just above the metal of the lower receiver.
- The left forearm must be horizontal.
- Your torso and upper arm length.
- The Stacking Swivel must be at your eye level (or higher if you are shorter).
Fully extending the right arm so that the elbow is hyper extended (bending inward or completely straight), what we tend to call “locked”, is unnecessary and is a break in uniformity of technique. This is quite common in people with hyper mobile joints.
The Right-hand Thumb

The M16
For the M16 (M4), the thumb is horizontal with the thumb tip resting on the rear of the charging handle. I believe that HQ NJROTC only looked at the service weapon manual of arms and didn’t read the appendices to fully understand the application of the right thumb standard.
History note: the 2003 edition of the Order had the right thumb tucked just like every other rifle manual. The thumb horizontal with the thumb tip touching the charging handle is a change for the 2019 edition that doesn’t make sense since there is no difference between rifles for the distance from where the left pinky rests to where the right thumb rests when at Present, which is about 9″. The M16 and even the M4/M5 platforms are shorter in overall length from the M1, M14, and M1903, but the distance for the chamber for all rifles is the same.
The text for the right hand for the M16 (colored highlighting mine):
(2) On the second count, release the grasp of the right hand and regrasp the small of the stock. The charging handle rests on the tip of the thumb of the right hand which is fully extended horizontally. The fingers are extended and joined diagonally across the small of the stock with all four fingers touching but not extending past the stock. The right wrist and forearm remain straight. The elbow is slightly bent and held against the body. The left thumb is four inches from the body. (See figure 3-15c.)
MCO 5060.20 Encl. 1 Part I: Drill, 11. Present Arms from Order Arms (2)
I will breakdown what I highlighted in the text above. “Regrasp the small of the stock“: This statement with the word “grasp” in it sounds like the right hand is to hold into the small of the stock. That’s not the case for Present at all and there’s no argument for wrapping the thumb around the stock. The fingers are extended and joined diagonally across the small of the stock with all four fingers touching but not extending past the stock. The text here may be confusing with “across the stock”, and that’s why photos are included to ensure a good understanding of the intent. “Not extending past the stock” is very helpful and we can understand that “across the stock” means from the side (see the images below). The right wrist and forearm remain straight. This is just like a hand salute. The wrist is not bent in any direction. The elbow is slightly bent and held against the body. This slight bend is the natural bend that your elbow has. Remember, those with any degree of hyper mobile joints may not have a “natural bend” and will have to adjust to make the bend in the elbow in formation for uniformity.
The M1 and M14 (and M1903)
In the appendices, we see that the right thumb is tucked directly into the palm and placed behind the small of the stock for the M1 and M14. For both rifles, the text says, “move your right hand to the small of the stock and grasp it” and “the right hand regrasps the rifle at the small of the stock”, just like the M16 text, and both show a tucked thumb.
It takes a bit of study to understand that the right hand does not wrap around the small of the stock and that the fingers are extended and joined while pointing downward at an angle to ensure they do not extend past the stock. Logically, we can then understand that placement of both hands is going to be exactly the same for the M1903.
Fingers are extended and joined pointing forward and down and not past the front edge of the small of the stock (I suggest a 45-degree angle).


Further

- Dipping the right shoulder is something that must be guarded against. Keep shoulders level.
- Thumbs not tucked must be paid attention to as well.
- The wrist cannot have extreme angles.
One last note. All of the services used to perform the same marching movements and manual of arms techniques. There has been a spiteful relationship between the Army and Navy since the late 1800s and eventually, we have ended up with all kinds of maddening variations for no apparent reason. This photo on the right is from the US Navy Landing Party Manual of 1960. Notice the Marine is wrapping his right-hand fingers around the small of the stock.
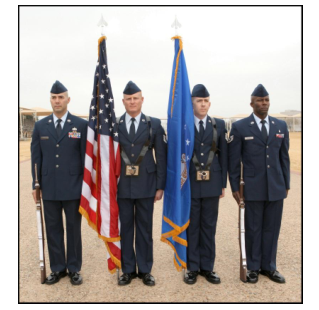
AFPAM 34-1203, Drill and Ceremonies (AF/SF)

FYI: The cadet manuals for AFJROTC and Civil Air Patrol are unusable for drill and ceremonies. I do not follow them, and I do not teach from them. I teach from the service standards which is where these cadet manuals are supposed to get their information, but there are all kinds of wrong standards in them.
Early On
The first Air Force Manual 50-14, Drill and Ceremonies, was published in 1953. It was a merger of the Army’s FM 22-5 and NAVMC 2691 with a bit of Air Force changes to either standard mixed in. Most of AF and now SF drill comes from the Marine Corps. The next version of AFM 50-14 was 1956. Both of these versions had a rifle and handgun manual of arms, but since only the Air Police used both manuals and not the general population of the Air Force, AFM 50-14 published in 1960 removed all weapon manuals. (The photo at right includes Mrs. DrillMaster’s thumb tip.)
History note: notice in the photo from the 1953 manual that the color guard members are not cupping their hands? No one did until the mid 1960s and then it was only “curl your fingers”. The cupped hand came about years later for all services.
Now What?
Air Police performed a majority of color guards throughout the AF just like MPs did for the Army and Marine Corps. That means the 1960, 1963, and 1966 editions of AFM 50-14; the 1985 and 1992 editions of (now a regulation) AFR 50-14; and the 1996 edition of AFMAN 36-2203 (back to a manual with a different abbreviation and a new number) all had the guards with a sidearm in a holster.

In the 2013 edition of AFMAN 36-2203 the guards were armed with rifles for the first time. Now, with the advent of the rifle and seeing that the guards were at the outside shoulder, that meant the USAF was to go to MCO 5060.20, regardless of rifle type (I can’t stress that enough), since the Marine guards were at what they call the outboard shoulder (same thing).
The latest edition of the AF drill and ceremonies manual is Air Force Pamphlet- tantamount to a sticky note on the screen of your computer, is AFPAM 34-1203.
In all the previous versions the manual/regulation/pamphlet has undergone some changes and none of them for the good. The thinking for these changes was not realistic, creating wrong standards. I explain that here. Please see The Argument from AFPAM 34-1203 for the reasoning for this and The Why of the Color Guard – USAF/USSF may also be helpful.
Conclusion
If you follow Army techniques: wrap all fingers and don’t thumb a ride.
If you follow Marine Corps techniques: wrap the left-hand fingers, flare the right, and tuck that right thumb.
If you follow Air Force techniques: see the Army for an armed flight and the Marine Corps for the guards on a color guard.