
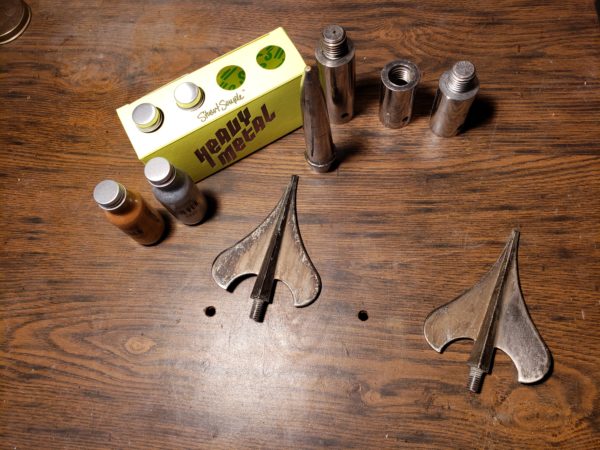
There are spade finials out there that are damaged, I’m sure. Here, you will see the steps to make a spade finial presentable again. I use the word, presentable, because I am using things I have on hand to try to keep costs low.
The chrome finish that the spade had when it was brand new is not going to be brought back to life unless you spend the money to send it to a company that can re-chrome. I use Plano Metal Specialties in Plano, IL for my bayonets. It can be expensive, however.
For everyone’s information, the spade finial is not chromed, it’s just coated in nickel. The next step would be a chrome coating.
Following are the results of a collaboration between DeVaughn Simper, vexillologist, and me.
The Process

1.Prep Your Pieces
Wrap painter’s tape around any threads. For the upper or lower ferrule, I put each on a stick and locked the stick into my workbench vice. I even used a clamp to hold the finial by the threads and put the clamp in another vice I have.
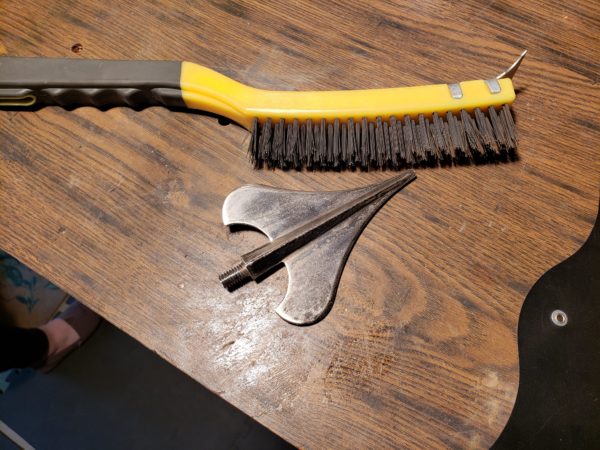
2. Wire Brush.
If you have finials that have as much corrosion as the ones pictured at the top of the page, use a wire bristle brush, it really helps to get the crud off and keep the metal smooth.

3. Sandpaper.
Use sandpaper if you want get any nicks or scratches out of the surface and to remove any remaining corrosion. You may want to use something around 1500 grit and maybe even work your way up to remove and sanding lines.
Note: You could use low grit sandpaper and work your way up to high grit and possibly come out with an amazing mirror-like finish like ceremonial guardsmen do with their cheaters. It take hours of work but might be worth it to you. Once you get the mirror shine, you would coat it with several layers of a clear gloss. For complete details on how to accomplish this, read this article: How to Shine Your Heel Taps- “Cheaters”.
4. Rinse and dry completely.
This is essential as it removes any dust particles.
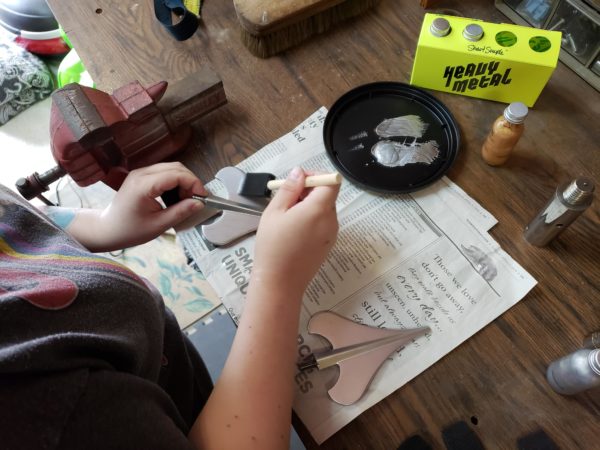
5. Apply Light Coat of Paint
A big thank you to my daughter, who is a cosmetologist, for her help. I learned that this process is similar to professionally painting fingernails. The paint dried much better in the sunlight (UV).
I used what I had on hand. I do not recommend a brush, foam or bristle. They tend to leave lines. I live in FL and we have some pretty decent humidity, even in the winter months. What I learned is that we needed to wait a couple of hours at least for the paint’s moisture to completely disappear.
As a matter of fact, I started putting one coat on in the morning and then one before dinner. I repeated over the next couple of days ending with three and four coats of paint.
Paint
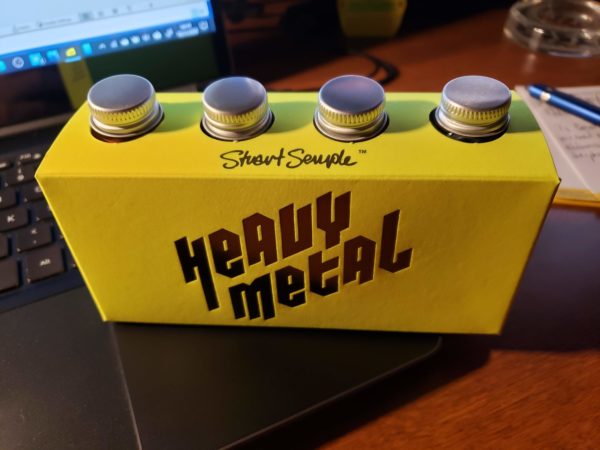
I used the acrylic “chrome paint” from www.culterhustle.com and I am certain that if I would have applied the paint with an airbrush, the results would have been much better.

Next, I wanted to see what the gold paint from Culture Hustle (CH) would do. In the photo at the left, you can see that I painted two pieces the gold color.
The lower ferrule at the bottom I used the Gold paint from CH. It was nice, but spraying it on would have been better. For the middle screw joint, I used gold spray paint that we had. It turned out just as good if not better (more even, no lines). The photos don’t do the painting justice.
I applied three coats of paint letting it dry/cure for hours. Make sure you apply it evenly and ensure that it’s completely dry.
7. Clear Coating.
The first and second coats didn’t really seem to do much but the third and fourth really brought out a nice shine. I used Rustoleum gloss clear coat. It did a great job.
Again, I made sure that I left it for a few hours between coats.
The Results
I would put the metal pieces on a staff and use them, even with the extensive lines from the paint brush on the spade. I do prefer the spray paint and then the clear coat purely due to the even application.
This process can save you some money along with refurbishing your guidon flagstaff yourself.
Comments 2
Sir, I understand this post is a few years old but, do you recall what brand and type of gold spray paint you used? Thank you.
Author
Hi Sheldon,
It was just a gold-tone spray paint. A couple of coats and then coats of clear finish.
DM